Showing posts with label Windows. Show all posts

Windows 10 Dark Theme: How To Enable

Windows 10 dark Theme
Windows 10 is actually Microsoft's best operating system by far. The new operating system which is currently running on more than 270 million devices in the world is packed with lots of great features coupled with great innovation like Cortana, the personal Assistant. Ever thought of making almost everything on your computer look darkish? Or do you just love it when you have bright text on a dark background? Either ways, it all makes stuff look great on the device right?

It would have been awesome if Microsoft just introduced a toggle that could enable one apply dark theme to his or her PC without much hustle. Though this is not the case, one can still apply the hidden dark theme feature without really doing anything much complicated. To apply the dark theme,
  1. Press the Windows key alongside the "X" key simultaneously.
  2. Click "Run" and type "Regedit"
  3. Navigate to HKEY_CURRENT_USER\SOFTWARE\Microsoft\Windows\CurrentVersion\Themes\Personalize
  4. Right Click, New/DWORD (32-bit) Value
  5. Value Name = AppsUseLightTheme
  6. Right click and click on Modify
  7. On the pop up, Select Hexadecimal and set the Value data = 0
    Editing the DWORD (32-bit) Value
  8. Reboot your computer
After you reboot your computer, your Settings and other Windows built in programs should change to dark.
NB: whenever you want to change the theme to light, just change the DWORD value to 0 or delete the Value created.

We just hope that in the not too distant future, Microsoft includes this feature as a simple toggle.


Windows 10 Touchpad Gestures

Windows 10 was released by Microsoft on July 29th, 2015 with the aim of giving people the best experience on Windows. Microsoft CEO, Satya Nadella said, "we are moving from the era of people using Windows to the era of people choosing and loving Windows". True to his words, Windows 10 comes as something "cool". Today, I will be taking you through one of the "cool" features; the Windows 10 Touchpad gestures.

Not all existing laptops that have been updated to Windows 10 will be able to use these gestures. More modern Windows 10 devices should be capable of doing so. For one to be able to use these gestures, one requires a “Precision Touchpad” (Some PCs don't meet the Microsoft precision touchpad but their manufacturers have installed drivers to activate this feature.) You can check if your PC has a precision touchpad by opening the Settings app, selecting Devices, and selecting Mouse & touchpad. You’ll see the line Your PC has a precision touchpad under the Touchpad heading here if it does.


When done checking and your PC has Precision Touchpad, try the following gestures.

  • Launch Cortana: Tap the Touchpad with three fingers to launch Cortana.
  • Show Desktop: Swipe three fingers down to show the desktop.
  • Open Task View: Swipe three fingers up to open task view and see all your open apps.
  • View and Select Opened apps: Swipe three fingers either left or right to switch between your open apps. Slide your fingers slowly across the touchpad to flip through them all.
  • Zoom: To zoom in and out, place two fingers on the touchpad and pinch them together or stretch them apart — just like you’d zoom in or out on a touchscreen.
  • Scroll: To scroll around in a document, web page, or anywhere else you might use a scroll wheel, place two fingers on the touchpad and move them either horizontally or vertically.
  • Right-Click: Tap the touchpad with two fingers.


How To Configure Windows 10 Touchpad Gestures

Windows 10 comes with new features some being Cortana, Microsoft Edge, touchpad gesture support and more. In this post, I will take you through how to enable touchpad gestures on your device.

Gestures won't work on all existing PCs but will work near perfect (if not perfect) on devices with precision touchpad. Some PCs may not have precision touchpad but its manufacturer could have installed some drivers that will make gestures work.

To enable or disable gestures, go to Settings > Mouse & touchpad. Here you can switch on the gestures that you want and off the gestures you don't want. You can also select what a three finger tap does (on default it opens Cortana) and also what a three finger drag should do (on default, you can switch between apps).

If your PC doesn't have precision touchpad but gestures do work, then you will be able to do your set up somewhere in touchpad utility settings on your PC.

In order to enjoy the usage of gestures on your PC, check if your PC has precision touchpad before you purchase.

Windows 10 Icon Missing? Check out how to get it.

How To Get The Missing Windows 10 App Icon

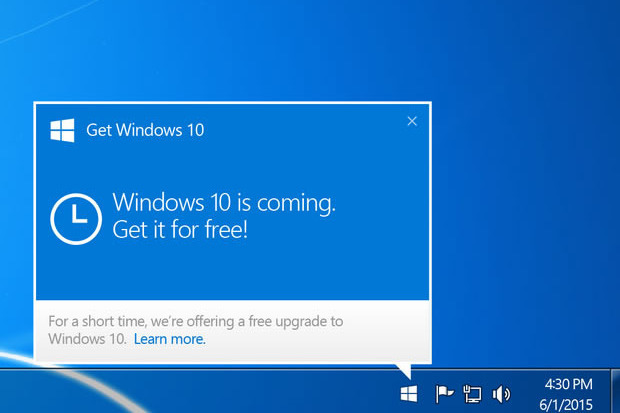
It's just few days more till the "Big Day". The day on which the windows 10 update will be released for free. You can choose to reserve it in order to get it immediately it is released or wait for it to be released and get to update if you meet the minimum requirements.

First let's take a look at the requirements for upgrade to and also for you to be able to get the reserve button for Windows 10.

To be able to upgrade to or get the reserve icon for Windows 10,
  • Your device must be up-to-date with at least Windows 7 SP1 or Windows 8.1 Update
  • Windows Update is turned on and set to received updates automatically 
  • You’ve not blocked or uninstalled the necessary Windows Update functionality. 
  • Your device is not running genuine Windows 
  • Your device is not running Windows 7 Enterprise, Windows 8/8.1 Enterprise, or Windows RT/RT 8.1( these are excluded from the reservation offer.) 
If you meet all the requirements ablove but you are still not seeing the Icon, follow the instructions below to get the icon.
  1. Open Notepad
  2. Copy the text below and paste it into Notepad:

REG QUERY "HKLM\SOFTWARE\Microsoft\Windows NT\CurrentVersion\AppCompatFlags\UpgradeExperienceIndicators" /v UpgEx | findstr UpgEx

if "%errorlevel%" == "0" GOTO RunGWX

reg add "HKLM\SOFTWARE\Microsoft\Windows NT\CurrentVersion\AppCompatFlags\Appraiser" /v UtcOnetimeSend /t REG_DWORD /d 1 /f

schtasks /run /TN "\Microsoft\Windows\Application Experience\Microsoft Compatibility Appraiser"

:CompatCheckRunning

schtasks /query /TN "\Microsoft\Windows\Application Experience\Microsoft Compatibility Appraiser"

schtasks /query /TN "\Microsoft\Windows\Application Experience\Microsoft Compatibility Appraiser" | findstr Ready

if NOT "%errorlevel%" == "0" ping localhost >nul &goto :CompatCheckRunning

:RunGWX

schtasks /run /TN "\Microsoft\Windows\Setup\gwx\refreshgwxconfig"


  1. Click File, and then Save As
  2. In the File name box, change the file name to ReserveWin10.cmd 
  3. Then click the drop-down next to Save as type, and select All files (*.*) 
  4. Select the folder you would like to save the file to. For this example, let’s choose to save the file to the C:/Temp folder. Then click Save. 
  5. Open an elevated command prompt. (From the Start screen or Start menu, type Command Prompt in the search box, and then in the list of results, right-click Command Prompt, and selectRun as administrator.) 
  6. Finally, run the file from the location you saved to in Step 6. In this example, you would type the following in the Command Prompt window and hit Enter: C:/Temp/ReserveWin10.cmd
This compatibility appraiser can take up to 30 minutes to run; the script will continuously give status report. If the script is failing in an infinite loop, it simply means you don't have all the prerequisite Windows  updates (Manually check for updates if this is the case).

So this is the best way to get the missing windows 10 icon.

You can check the windows 10 features here.

If you have any problem, feel free to leave a comment.

How to Use your android device everywhere through your PC; take total control of your device

Switching between devices is really hectic especially if you are a busy person who doesn't have enough time for such a job. But the truth is that the more devices are released, the more we yearn for them. Phones are they most common and Android devices top the list cos so many of them are released each year. What of being able to use all those devices on one PC so you can easily do work on your PC and still be able to reply all messages and calls from your Android devices via the same PC? Well, that's exactly what I will be walking you through today.

Let's roll

There are many apps on Playstore that try to do the job but they only end up showing notifications and some other things and nothing more but Airdroid does the real job. And you don't necessarily need to be on the same network which means distance is not a barrier between you and your device provided both your PC device are connected to the internet.

WHAT CAN AIRDROID DO?

Airdroid is just awesome and can be used to do almost everything you can use your Android device for. You can do all that using a PC and some of the things even through another phone. This app can be used to view contacts, receive calls, send and download files and open and use any app on the Android device. In fact, you take total control of your Android device through your PC. And if you're on premium, you are spoilt for choice

HOW TO USE AIRDROID

For you to be able to use Airdroid, you need to download the app for your Android device and your Windows or Mac PC by clicking/tapping on the links in red, Install and run it on both your Android and PC.
  • For file transfer: Using Android for file transfer is fast, safe and convenient. All you need to do is;
  1. Open the app on your Android device. And if your device is already connected to a WiFi, connect your PC to the same network but if no WiFi network is available, tap on the hotspot
    button in order for the device to tether WiFi to your PC (Your data will not consumed when you tether WiFi for file transfer using Airdroid)
  2. When your PC is connected to the WiFi, type the IP address
    you see into you computer's browser's address bar and click go.
  3. When prompted on your Android, tap accept in order to access all your files via the computer's browser.
  4. Now you can select the file type you want to download from the device to the PC and then select the folder, then the file and click download for the transfer to commence (The files download or upload at at least 1mb/s)
  • As a webcam or security cam: Since the app allows you to use your camera via a browser on your PC, you can keep your android device anywhere in the house, be anywhere in the world and still be able to view whatever is going on where the device's camera can view provided you Android device and the PC are both connected to the internet. If you need to use the camera of your phone while on different networks then you will need to Sign up but if on the same network then you don't need to do anything more. There are two methods. By using the desktop client or using a browser.

USING A BROWSER FOR AIRDROID CAMERA USAGE


THE BROWSER METHOD
  1. Open the app on your Android device and if your device is already connected to a WiFi, connect your PC to the same network but if no WiFi network is available, tap on the hotspot button in order for the device to tether WiFi to your PC. If you are far from the device and therefore cannot be on the same network then you need sign up in order to use it.
  2. When your PC is connected to the WiFi, type the IP address you see into you computer's browser's address bar and click go. If you are not on the same network, go to web.airdroid.com, and sign in.
  3. When prompted on your Android, tap accept in order to access all your files via the computer's browser (This will not be displayed when you sign in)
  4. When the page opens, select the camera app and you are good to go.

USING THE DESKTOP CLIENT FOR CAMERA

  1. Open the desktop client and sign in.
  2. Click on the Airmirror
    button and allow it to connect to your Android device.
  3. When it is connected, you device's screen will automatically show. Open your camera app via the Airmirror and you will be able to see everything going on. You can choose between the front and back camera that's if you have two.
  • The Airdroid desktop client and its uses: The Airdroid desktop client comes with loads of features that are so mouth watering. It allows you to use your Android device from your PC like you will if it were in your hands. You can actually do anything like set your time, take pictures, record videos, go to settings, play games and any other thing you can use your Android for.

HOW TO USE ANDROID DESKTOP CLIENT TO CONTROL YOUR ANDROID

  1.  This button is the profile button. This is where you will be able to see your devices, your email address and also be able to setup your account.
  2.  This button is the file transfer button where you will be able to send files from the PC to any of your devices without being with them provided they are connected to the internet. 
  3.  This is the notifications button. All notifications that pop up on your screen are stored here. You can clear the notifications anytime you want by clicking the delete button.
  4. The messages button is where you can read all the text messages you've received and also send messages. 
  5.  This is where you view your calls log
  6. The contacts button enables you to view all your contacts.
  7. The Airmirror button (which I call the super button) is where everything lies. This is where you are able to remotely control your android device from anywhere in the world just by a single click. When the button is clicked, the Airmirror launches and you are able to use your device's screen on your desktop. With this, you can make calls, use all apps, send and receive messages and also go into your Android device's settings. The Airmirror can also be launched just by click on notifications when they pop  up on the desktop(this will automatically launch the specific app).
What do you think about Airdroid? Do you know any other app that performs the same function? Your feedback is really important,

How to transfer files from iPhone or iPad to PC and vice versa without USB cable: 3 best and risk free ways

USB cables aside the fact that using them to transfer files is slow, they get destroyed quite easily and it is sometimes just annoying carrying them around. Transferring files without them is on the other hand handy  and you actually face no problems like broken cables and others. Do you just want to transfer files faster or you just hate the USB cable? Well, today I will be taking you through 3 ways you can transfer files from your iPhone, iPad or iPod to your PC without using your USB cable. Maybe after this, you might never need the USB cable again.

Let's get started


  • Shared WiFi: Shared WiFi simply means being on the same WiFi network for file transfer to take place. There are many apps in the Appstore that perform the cordless sharing stuff but in my opinion, there is none better than Air Transfer but Kingsoft office free also does the job quite well. This app is the best for transferring music, movies, documents and any other thing wirelessly without problems.The file is free with limits on the number of files you can transfer but you can upgrade in order to go unlimited.


HOW TO USE AIR TRANSFER


  1. Tap the WiFi switch and an IP address will appear.
  2. Open a browser on your PC and type the URL including the port in the address bar and click go.
  3. In order to transfer files from your phone to the computer, click on the down button next to the list of files and your files will be downloaded.
  4. To transfer files from PC to your phone, go to your computer's files, highlight the ones you want, drag and drop them onto the drop files here area on your web interface and they will be automatically sent to your device.
  • Bluetooth: Sending files through Bluetooth is admittedly slow but comes handy when you do not have WiFi connection and your USB cable is not functioning. Just go to your PC and also your other device's Settings, switch on the Bluetooth and start your file transfer.
  • Cloud Storage and Sharing: (Dropbox, Google Drive, OneDrive, iCloud). Cloud storage is becoming more common now a days and I can't talk about wireless file transfer without adding it. Google Drive is really popular with 10GB free space, OneDrive gives you 15GB and Dropbox gives you 2GB  free space. An advantage of using this service is that you get to access all your files anywhere, anytime and on any device device provided you have internet connection. All you need is your login data.

Those are the best 3 ways to wirelessly transfer files from your iPhone, iPad or iPod to your PC. It's now your turn to choose the one you prefer more

Your feedback is really important.